Let’s cut through the noise—when a farmer, hobbyist, or small business owner hears “steel barn,” the first question isn’t “Is it durable?” It’s “How much is this actually going to cost me?” As someone who’s been selling and installing steel structure barns for 12 years, I’ve heard that question a thousand times. I’ve also watched people overspend because they fixate on one “cheap” trick that blows up their timeline, or ignore small, smart choices that add up to big savings. This post isn’t about cutting corners—it’s about building a steel barn that fits your needs without draining your bank account, straight from the guy who shows up on job sites and sees both the wins and the mistakes. Steel Structure Barn
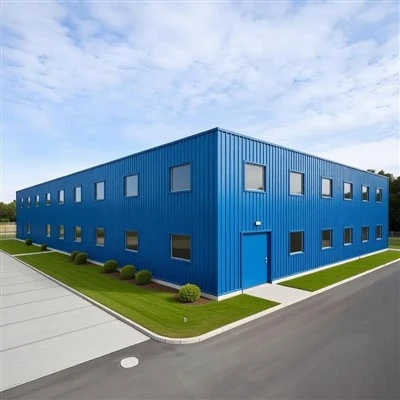
First, let’s get one thing straight: the “cheapest way” doesn’t mean the shoddiest way. A $5,000 steel barn that collapses in the first heavy snow isn’t cheap—it’s a liability. The sweet spot is balancing upfront costs, long-term durability, and your specific use case. Whether you’re housing 20 head of cattle, storing farm equipment, or need extra space for a small workshop, these are the steps I’ve learned over a decade that keep costs low without skimping on quality.
Start with the design phase—this is where most people waste money without even realizing it. A custom-designed barn might sound like it’s tailored exactly to you, but unless your needs are totally one-of-a-kind, standard pre-engineered steel structures are almost always cheaper. Pre-engineered means the frame, panels, and trim are cut to fixed, standard dimensions—no custom manufacturing fees, no waiting 4 weeks for a piece that’s been “made just for you.” For example, a 30x40x12 ft barn (that’s 1,200 sq ft, the sweet spot for equipment storage or small livestock) is a standard size. Customizing it to 31×41 ft would add 10-15% to the total cost just for the custom steel cutting. I tell every new customer: measure what you actually need, then size up by 10% (never more) so you have room for future gear without a full rebuild. A few extra feet at the end of your barn is way cheaper than adding an entire bay later.
Another big design hack: keep it simple. No fancy curves, no overcomplicated roof lines, no extra gables you “might want someday.” I once had a customer who insisted on a gambrel roof (the steep, barn-style roof that looks great in paintings) for a 30×50 ft equipment barn. By the time we added the extra trusses, higher side walls, and the specialized trim for the roof’s angle, he paid $12,000 more than if he’d gone with a standard gable roof. Gambrel roofs make sense for hay storage, because they have extra space in the peak, but if you’re just storing tractors or trailers, a simple gable works just as well and saves thousands. Stick to straight walls, a single roof slope, and minimal openings early on—you can always cut doors or windows in later if you need them, and that’s way cheaper than modifying a custom frame.
Next, don’t skip site prep, but don’t overdo it either. I’ve seen customers drop $2,000 on a full concrete slab for a barn that’s only storing hay bales. Hay doesn’t need a concrete floor— you can use compacted gravel for less than $500, and it’s just as functional. The key here is matching your foundation to your use case. For equipment or livestock that will be on the barn’s floor all the time, a concrete slab works best, but you don’t need to pour a 6-inch thick slab—3.5 inches is enough for most applications. Skip the reinforced rebar unless you’re storing very heavy equipment like a semi-truck or a large combine. For lighter use, just a layer of 4-millimeter plastic sheeting under the concrete (to prevent weeds and moisture) and compacted gravel base is more than enough.
Also, get the grading right. The site needs to slope away from the barn to prevent water pooling, but you don’t need to bring in 10 yards of fill dirt to level it perfectly. A 2% slope (about 2 inches of drop for every 10 feet of barn length) is all you need, and you can usually grade the site with a small rental tractor for a fraction of the cost of professional grading. I always tell customers to do the site prep themselves if they’re handy—most of the time, it’s manageable with a few tools and a friend. Save the pros for the steel work itself; you don’t want to mess up the frame alignment.
When it comes to buying the steel materials, shop around but don’t go for the absolute cheapest steel you find. That $0.50 per pound difference might seem small, but over a 10,000-pound barn frame, that’s a $5,000 gap—and cheap steel is thinner, rusts faster, and will need replacing in 10 years instead of 30. Instead, look for local steel suppliers that specialize in pre-engineered structures. Local suppliers don’t charge for long-distance shipping (steel is heavy, shipping costs can add 20% to the total price if you’re 50 miles away), and they usually have standard sizes in stock so you don’t have to wait. I also recommend buying all your materials from one supplier, not mixing parts from different places. Mixing panels from two different brands can lead to color mismatches, and if something goes wrong with a part, you have to deal with two companies instead of one.
A huge money-saver that most people don’t think about is doing the labor yourself. Now, I’m not talking about climbing on a ladder to bolt the roof trusses (that’s dangerous, and I’ve seen too many people get hurt trying to save a few bucks), but most of the prep work, interior finishing, and small installs are doable if you’re handy. A professional crew will charge $15-$20 per square foot to install a steel barn, which for a 1,200 sq ft barn is $18,000-$24,000. If you can do the site prep, pour a simple concrete floor, hang interior walls, and install the doors and windows yourself, you can cut that labor cost in half or more. The only parts I leave to the pros are the heavy lifting (trusses and large wall panels) and the electrical work if you’re adding lights or outlets. Even then, many electricians will work with you if you prep all the conduit and wiring ahead of time, so their time is just hooking things up instead of running new lines.
Wait, what about insulation? A lot of people think they have to insulate the entire barn right away, especially if they’re using it for livestock or a workshop. But insulation is a luxury, not a necessity. If you’re storing equipment, you can wait to insulate until you can afford it—you can always add foam panels or fiberglass batting later, and that’s way easier and cheaper than insulating during the initial build. For livestock, a few space heaters or temporary windbreaks can keep animals comfortable in the first year, and then you can add insulation in the off-season. I’ve had customers who waited three years to insulate their barns and saved over $3,000 upfront, and they never regretted it. The only time you should insulate right away is if you’re using the barn for year-round living space, like a small apartment.
Another trick: take advantage of off-season deals. Steel suppliers and barn companies almost always discount prices in the winter, when there’s less demand for new builds. Everyone wants to build a barn in the spring or summer, so prices go up. If you can plan your build for October to February, you can save 10-15% on materials and even get a discount on installation if you hire a crew that’s looking for work in the slow months. I always remind my customers to plan ahead—book your supplier and crew in the fall for a spring build, or even build in the winter if you’re comfortable with cold weather, to get that lower price.
Let’s talk about common mistakes that people make that actually make their barn more expensive. First, buying too big. A customer once came to me wanting a 40×60 ft barn for a small John Deere tractor and a few hay bales. He ended up paying $18,000, but a 30×40 ft barn would have fit everything perfectly and cost $12,000. That’s $6,000 wasted just because he thought “bigger is cheaper per square foot.” It’s not—smaller standard sizes have lower per-square-foot costs than oversized ones because the materials are pre-cut in bulk. So calculate exactly what you need, not what you think you might want in 10 years. You can always add on later, and that add-on will be cheaper than building a huge barn upfront.
Second, skimping on the roof. The roof is the most important part of a steel barn—if it leaks, the whole barn is ruined. But that doesn’t mean you have to buy the most expensive roof panels. A 29-gauge steel panel is standard, and it will last 20-25 years. A 26-gauge panel might last 30 years, but it’s 20% more expensive, and unless you live in an area with extreme weather (like frequent hurricane-force winds or heavy snow loads over 50 pounds per square foot), the 29-gauge is more than enough. I’ve installed hundreds of barns with 29-gauge roofs, and the only leaks I’ve ever had are from improper installation, not from the panel itself. Don’t let a salesperson talk you into “premium” panels you don’t need.
And finally, don’t forget to check for local permits. This is a hidden cost that can derail your budget if you don’t plan for it. Most areas require a building permit for any structure over 100 sq ft, and permits usually cost $100-$500, depending on your location. Skipping a permit might save you $300 now, but if your barn collapses or you want to sell your property later, the county could make you tear it down, costing you thousands. Always check with your local building department first—ask what’s required, what fees you’ll pay, and if there are any setback rules (how far the barn has to be from your property lines). That 10-minute phone call can save you a lot of headaches and money down the line.
So let’s recap the cheapest way to build a steel barn, no fluff, no corner-cutting: start with a standard size, simple design tailored exactly to your use case, not what you think you might need later. Prep the site yourself, matching the foundation to your needs (gravel for hay, concrete for equipment). Buy all materials from a local pre-engineered steel supplier, skip custom parts and overpriced “premium” upgrades. Do as much labor as you can safely handle, take advantage of off-season discounts, and never skip permits.
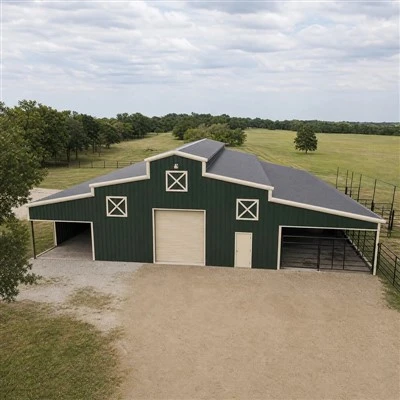
If you’re ready to stop overpaying for a steel barn that fits your needs, just reach out. I’ve helped hundreds of farmers and small business owners get the barn they want at a price they can afford—no pushy sales pitches, no hidden fees, just honest advice from someone who’s been in this game long enough to know what works.
Steel Structure Warehouses References
- American Iron and Steel Institute. (2022). Pre-Engineered Steel Structures: Cost-Effective Design and Installation Guidelines.
- USDA National Agricultural Library. (2021). Small Farm Building Cost-Saving Strategies for Steel Structures.
- Steel Manufacturers Association. (2023). Steel Building Durability and Cost Comparison for Agricultural Applications.
- National Association of Home Builders. (2022). Labor Cost Benchmarks for Residential and Commercial Building Projects.
Shenyang Huaying Weiye Steel Structure Co., Ltd.
Shenyang Huaying Weiye Steel Structure Co., Ltd. is one of the most professional steel structure barn manufacturers and suppliers in China, featured by quality products and good price. Please rest assured to wholesale CE approved steel structure barn made in China here and get quotation from our factory. We also accept customized orders.
Address: Shenyang Huaying Weiye Steel Structure Co., Ltd., Hongxing Road, Yuhong District, Shenyang City, Liaoning Province, China.
E-mail: syhywy.ss@gmail.com
WebSite: https://www.steelstructurehy.com/
