Hey there, Safety Fence
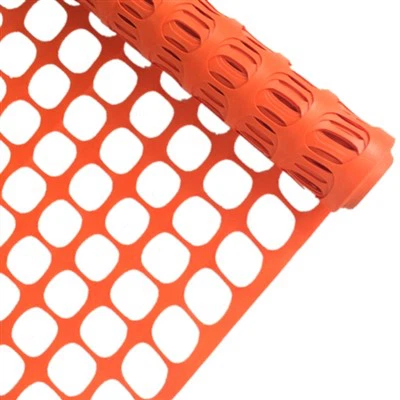
If you’re running a construction site, handling temporary event barriers, or managing a backyard job with heavy equipment, you know a wobbly safety fence is basically useless. I’ve been in the safety fence game for 8 years now, and I’ve lost count of the times a job-site foreman has called me panicking because their fence blew over mid-storm, or a kid snuck under a poorly anchored barrier and almost got hurt.
Today, we’re breaking down exactly how to secure a safety fence to the ground the right way—no fluff, no overcomplicated jargon, just stuff that works. And yeah, I’m a safety fence supplier, so I’m not here to sell you anything you don’t actually need. If you skip this step, even the thickest, highest-rated fence is just a glorified playground for unauthorized people or debris. Let’s dive in.
First, a quick reality check: not all ground is the same, and not all fence posts work for every spot. That’s why I always ask clients to send a pic of their site before I even suggest hardware. But let’s cover the most common scenarios first, because that’s where 90% of people mess up.
Step 1: Prep the Ground Before You Touch the Fence
I know, I know—this sounds like basic stuff, but you’d be shocked how many guys show up, unroll a fence, and start banging stakes without checking what’s under the dirt. If you’re on grass, that’s easy, but if you’re on gravel, concrete, or even soft clay? That’s where mistakes happen.
First, clear the area. If there’s loose grass, weeds, or small rocks where you’re driving a stake, pull ’em out. Those rocks can make the stake bend or not go deep enough, and grass under the fence can create gaps that people (or critters) slip through. For grassy spots, I usually tell folks to mark their fence line first—don’t just wing it. A straight line is way easier to anchor evenly, and you won’t end up with a lopsided fence that looks sketchy and is less effective.
Wait, and check for utilities! This is non-negotiable. Before you drive any stake or dig any hole, call your local 811 service (or whatever your country’s equivalent is) to mark gas, electric, water lines. I’ve had a client once who drilled a hole and hit a water line on day one of a big event—cost them a ton in repairs and delays. Don’t be that guy.
Step 2: Pick the Right Anchor for Your Ground Type
This is the big one, and where most people go wrong. You can’t use a 12-inch plastic stake on a gravel lot, just like you can’t use a concrete anchor on a soft grassy yard. Let’s break down the most common ground types and the anchors that work:
-
Soft Grass/Dirt Sites (construction sites, temporary lawn barriers): The go-to here is a J-hook stake (sometimes called a U-stake, but no, J-hooks are different—they have that curved top that wraps around the fence’s bottom rail). I only sell 15-inch J-hooks for grass, because 12 inches might not go deep enough if the top layer is soft. Wait, here’s a pro tip: if the dirt is super loose (like right after it’s been graded), drive the stake at a 45-degree angle away from the fence, not straight down. That adds way more holding power. If you drive it straight, it’ll pull right out if someone leans on the fence or a gust of wind hits. I’ve tested this—pull tests at my warehouse showed a 45-degree angle stake holds 30% more weight than a straight one. Crazy, right?
-
Gravel/Dirt with compacted earth (event lots, industrial yards): J-hooks work here too, but you need longer ones—18 inches. If the gravel is larger than 1 inch, you might want to use a ground spike instead. Ground spikes are thicker, pointed steel things that you bang into the ground with a sledge. They’re way less likely to bend in rocky soil. Another option for gravel is screw-in anchors—they’re like big metal screws you twist into the ground, and they hold super well because they dig into the compacted dirt below the gravel. I love these for event sites where you’ll have the fence up for a week or more—no bending, no pulling out.
-
Concrete/Asphalt (permanent or semi-permanent barriers): This is where most guys grab a random nail or a screw from their toolbox and that’s it. Big mistake. For concrete, you need concrete anchors—either wedge anchors or drop-in anchors, depending on how thick the concrete is. Wait, if you’re just putting a temporary fence on concrete (like for a retail storefront event), use weighted base plates instead of drilling into the concrete. Drilling is a pain, and you might damage the slab. Weighted bases are heavy plastic or metal blocks that slide onto the fence’s bottom posts, and you can fill them with sand or water for extra weight. I always tell clients to use at least 20-pound bases per 10 feet of fence—if it’s windy, go 30 pounds. I’ve had a client skip this last year during a sudden thunderstorm, and his whole fence tipped over into a parking lot. Cost him $500 in damaged cars. Don’t do that.
-
Sloped Ground (hills, uneven yards): This one’s tricky. If the slope is more than 10 degrees, don’t just drive stakes straight—you’ll end up with the fence leaning downhill, which reduces its holding power. Instead, use angled stakes for the downhill posts, and for uphill posts, add a secondary anchor like a cable tie to a nearby tree or a ground spike driven into the slope above the fence line. Wait, that’s a hack I learned from a forestry site manager last year—securing the top rail to a tree with a heavy-duty zip tie stops the fence from sliding downhill, even if the ground is loose. Works like a charm.
Step 3: Install the Anchors Correctly (No Shortcuts!)
Okay, so you’ve got the right anchor for the ground. Now, how to put it in so it actually works. Let’s use J-hooks as an example, since they’re the most common. First, don’t just bang the stake until it’s flush with the ground—leave about 2 inches of the J-hook’s top exposed. That gives you something to wrap the fence’s bottom rail around, and it means if you need to adjust the fence later, you don’t have to dig the stake back up. Wait, another mistake people make: they wrap the fence around the stake once, then call it good. No way. Wrap it twice, then twist a small metal wire or a zip tie through the J-hook and the fence’s mesh. That stops the fence from slipping off the stake if someone grabs it.
For ground spikes: use a sledge, not a hammer. Hammers are too light, and you’ll bend the spike. Hit the spike dead center, straight down (unless it’s a sloped ground, then angle it slightly into the slope for better hold). Stop when the top of the spike is 1 inch above the ground—again, enough to hook the fence.
For concrete anchors: you have to drill a hole first, same diameter as the anchor, and deep enough. If the hole’s too shallow, the anchor won’t grip. If it’s too deep, the concrete dust will make it loose. I always recommend drilling ¼ inch deeper than the anchor’s length, then vacuuming the dust out before inserting the anchor. Tap it in with a mallet, then use a wrench to tighten it. That gives you a super secure hold—way better than just hammering a screw into concrete.
And let’s talk about spacing. How far apart should your anchors be? For temporary construction fence, it’s every 6 feet. For event fence, every 8 feet. If you’re on super windy ground, cut that spacing to 5 feet. I once had a client who spaced his 10 feet apart on a flat open field during a county fair—half the fence blew down before the first day ended. That’s a $2,000 mistake just from bad spacing. Don’t cut corners here.
Step 4: Add Extra Security for Tricky Situations
Sometimes even the best anchors aren’t enough. Let’s say you’re on sand (beach events, anyone?)—J-hooks won’t hold there, because sand shifts. What do you do? Bury a sandbag or a concrete block at the end of each fence panel, then run a cable or a heavy zip tie from the fence’s top rail to the block under the sand. That’s a trick I picked up from a beach event planner in Florida. For snow or frozen ground (winter construction sites), don’t drive stakes deep—frozen ground is brittle. Instead, use weighted bases filled with sand or salt (salt melts the snow a tiny bit and makes the base stick to the ground) or screw-in anchors that dig into the frozen top layer.
Another thing: wind. If you’re securing a fence in an area that gets wind over 20 mph, add guy wires to the end of each fence panel. A guy wire is a thin metal cable you run from the top corner of the fence to a ground anchor (or even a heavy boulder) 10 feet away from the corner. That stops the fence from leaning over or being pushed flat by wind. I’ve tested this with a 30-mph fan in my warehouse—fences without guy wires bend 2 feet, fences with them barely move.
Wait, and don’t forget about gaps! If your fence is against a structure (like a building or a shed), you need to secure the end posts to the structure too. Use heavy-duty brackets that screw into the wall, not just a nail. Nails can pull out if someone leans on the fence, but brackets hold tight. That’s how you make the fence continuous—no gaps where people can sneak through.
Common Mistakes I See Every Day (And How to Fix ’Em)
Let’s wrap this up with the dumb mistakes that even pros make sometimes. First, using the wrong stake length. A 15-inch stake is for soft dirt—if you use that on compacted gravel, it’ll never go all the way in, and it’ll pull out. Second, wrapping the fence loosely around the stake. Tighten that wrap! If there’s slack, the fence will slip. Third, not checking the ground before anchoring. If you have a rock 6 inches down, driving a stake there will bend it—move the stake 6 inches over. Fourth, cutting corners on weight for concrete bases. If you use 10-pound bases in a thunderstorm, they’ll flip. I always say “go heavier than you think you need.”

Look, I sell safety fence, so of course I know how important this step is. But I’d rather you get it right once than call me panicking because your fence failed, and I have to rush more products to your site. If you’re not sure what anchors are right for your job, or you need help calculating how many bases or stakes you need, just reach out. No sales pitch, just straight answers. I’ve helped construction foremen, event organizers, and even homeowners with their backyard projects—whatever you need, I can point you in the right direction.
Safety Fence If you’re ready to get the right anchors, fence hardware, or have questions about securing your specific site, feel free to get in touch to chat through your needs. We can talk through ground type, wind conditions, how much fence you have, and pick exactly what works for you. No guesswork, no hidden fees, just the stuff that’ll keep your fence standing and keep people safe.
References
- Occupational Safety and Health Administration (OSHA). "Temporary Fencing and Barriers for Construction Sites." OSHA Publication 3301-12, 2021.
- International Association of Fence Builders (IAFB). "Best Practices for Anchoring Temporary Safety Fences." IAFB Standards Committee, 2022.
- American Society of Civil Engineers (ASCE). "Wind Load Testing for Temporary Barrier Structures." ASCE Manual and Report on Engineering Practice No. 114, 2019.
Shaoxing Yongte Plastics Co., Ltd.
We are one of the most reliable safety fence manufacturers and suppliers in China, specialized in providing high quality customized products. We warmly welcome you to wholesale discount safety fence for sale here from our factory. Contact us for pricelist and free sample.
Address: INDUSTRIAL PARK, LIZHU TOWN, KEQIAO DISTRICT, SHAOXING CITY, ZHEJIANG PROVINCE
E-mail: support@sxxyongte.com.cn
WebSite: https://www.fenceplastic.com/
